
If a credential is only valid for a certain amount of time, you can either set an auto-expiry period to your group or enter a specific date you would like the credential to expire.
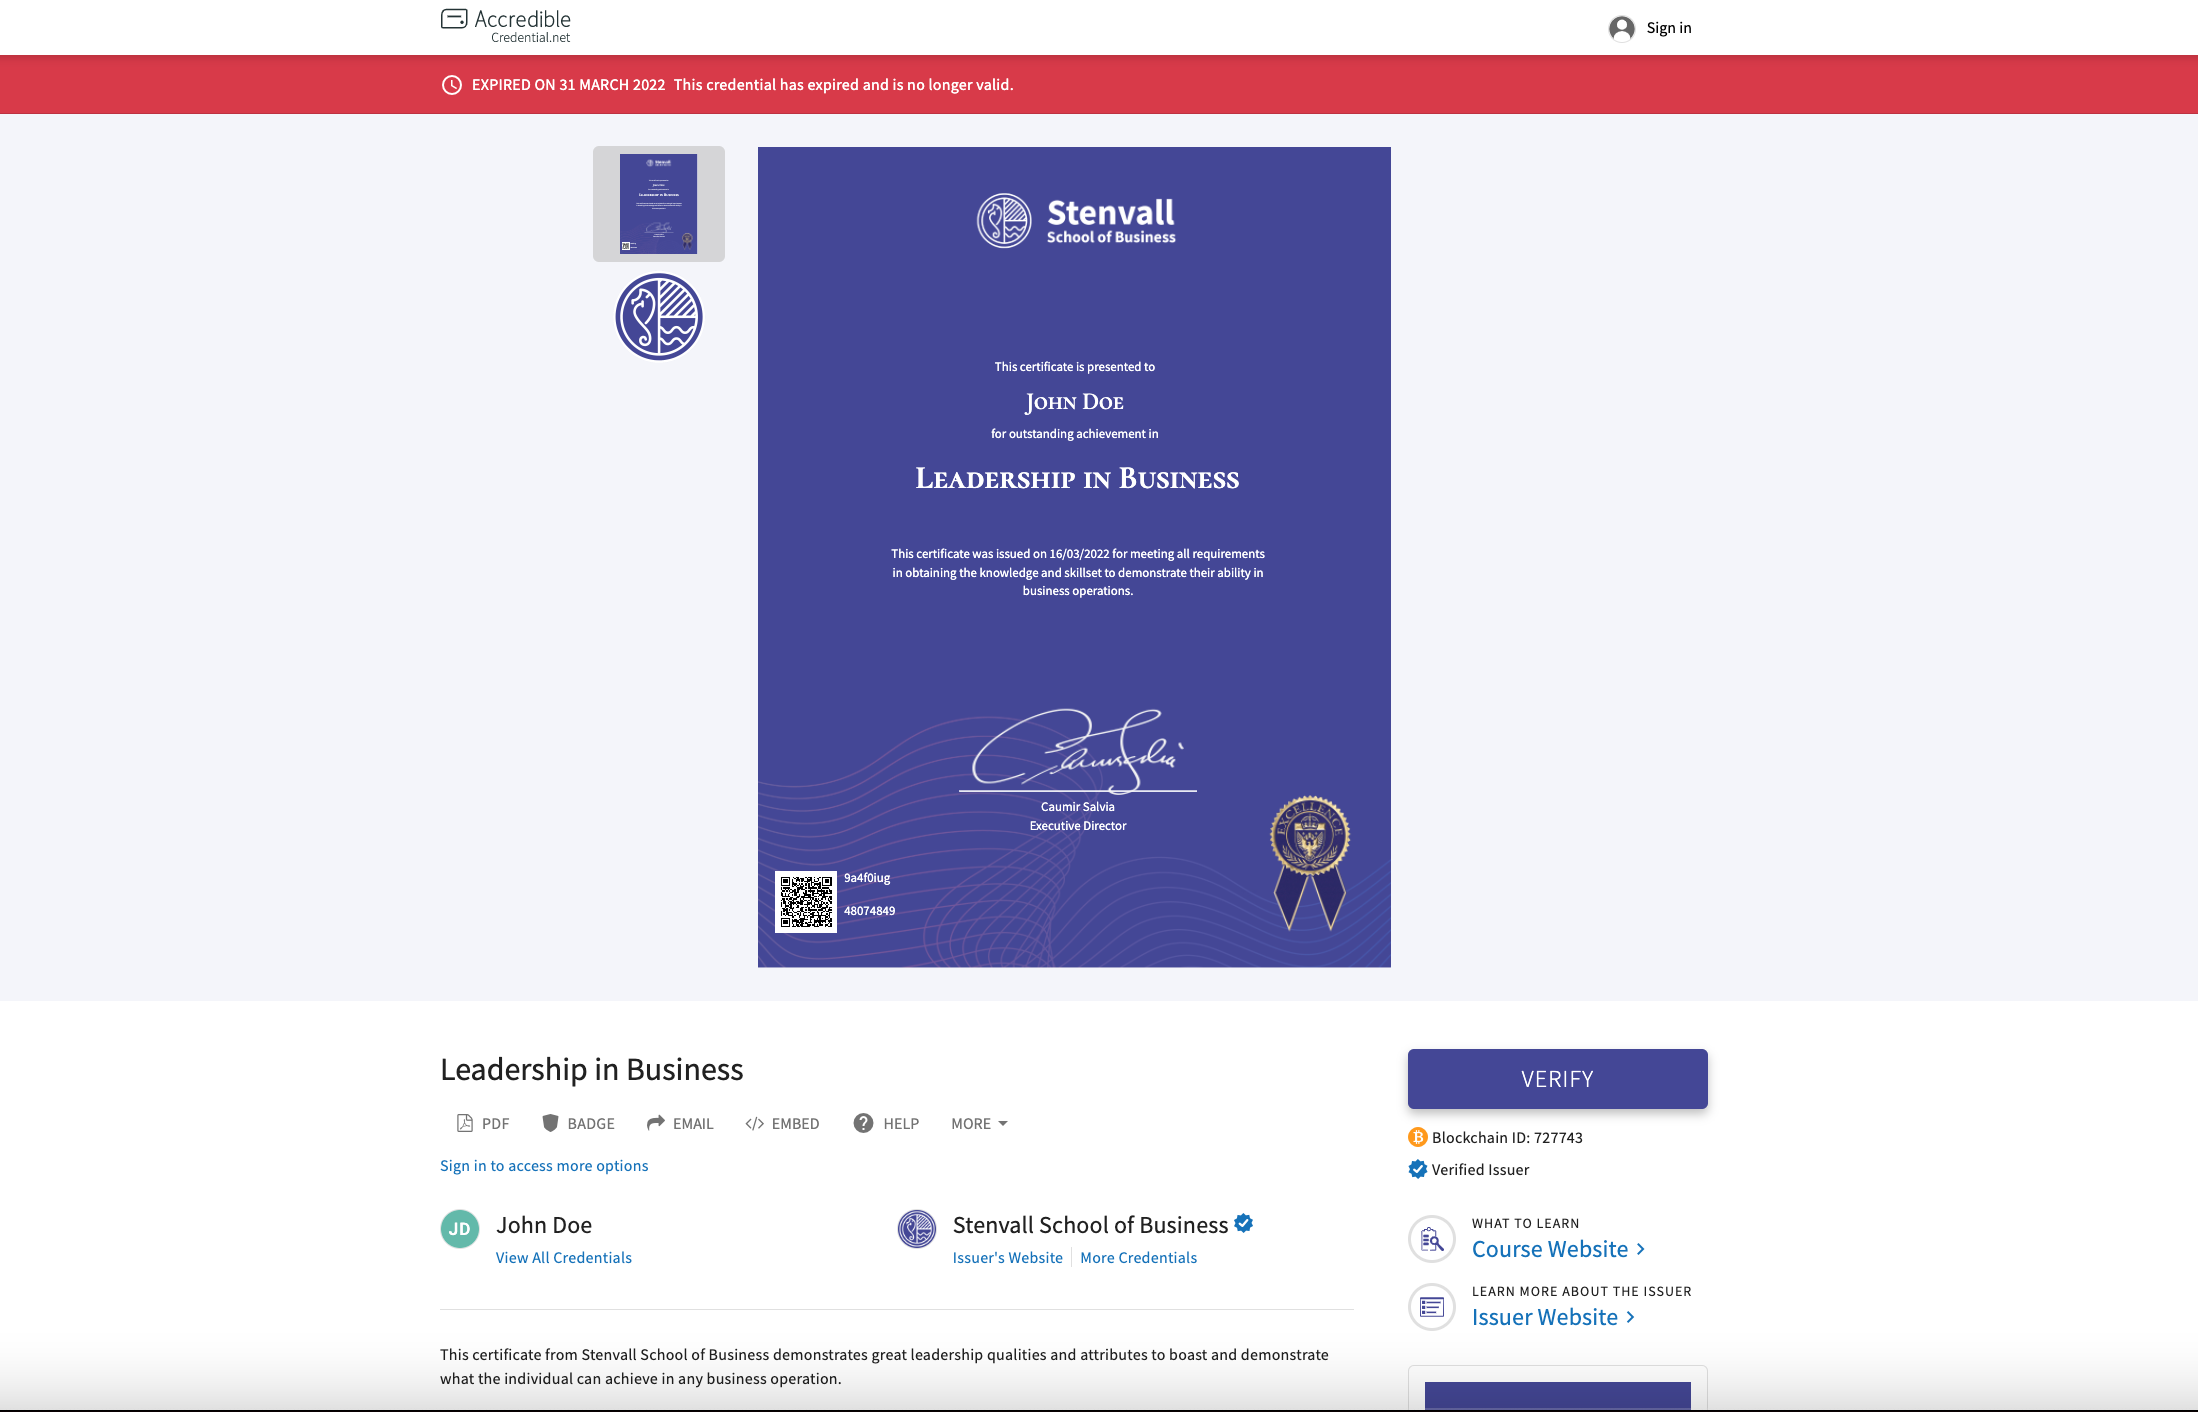
When a credential has an expiration date, your recipients will receive emails to let them know when their credential is about to expire or has expired. The Accredible system will automatically expire the credential for you; a notice will appear on the credential view saying that the credential is no longer valid. The credential will fail when tested with a verification tool, and any subsequent PDF downloads will have an expiry time stamp on them.
Adding the Right Attribute
If the award you're issuing expires, it's a good idea to have the expiration date visible on the certificate. Make sure that the certificate design you use has the attribute [credential.expired_on] on it. To find out more about how to add attributes, click here.
Setting an Auto-Expiry
If you would like the credential to automatically expire after a certain amount of time has elapsed since the date of issue, use this method to add an auto-expiry.
1. Go to 'Groups' at the top of your Accredible dashboard
2. Find the group you would like to add the auto-expiry period to and click 'Group Settings'
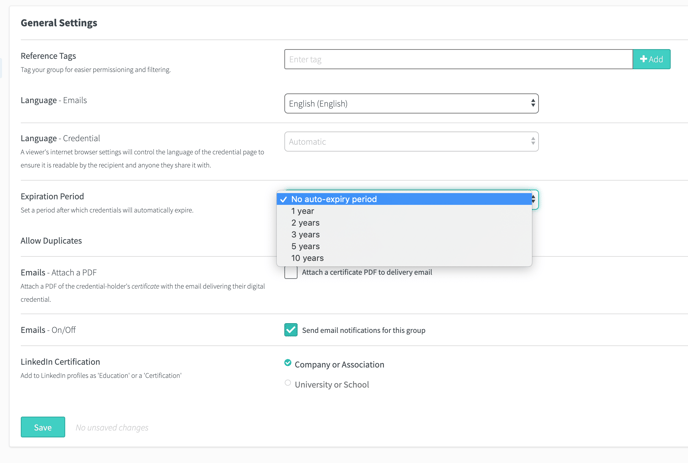
3. In the left-hand sidebar menu of Group Settings, click 'General Settings'
4. In the section called 'Expiration Period,' use the drop-down menu to select how long you would like the credential to be valid after the date of issue.
5. Click 'Save' at the bottom of the page.
Here is an example of what will happen using this method:
You've set your auto-expiry to three years. If you publish credentials with an issue date of 1st Jan 2019, the [credential.expired_on] attribute will be replaced with the date 1st Jan 2022. When 1st Jan 2022 comes, the credential will automatically expire.
Note: The Auto-Expiry setting only applies to newly created credentials. If you want to change an existing credential's expiration date, visit our article How Can I Manually Expire Credentials?
Using a Specific Date
If the credential needs to expire on a specific date, instead of being valid for a set amount of time, use this method.
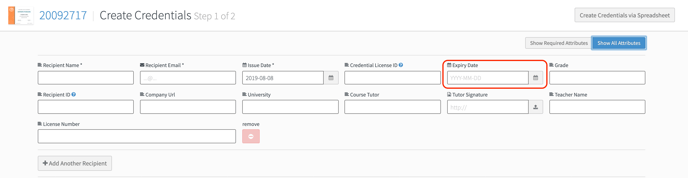
If you are using the Manual Upload Method
In the manual upload screen, add the specific date you want the credential to expire on into the 'Expiry Date' field. For more information on how to upload credentials manually, click here.
If you are using the Spreadsheet Upload Method
Add a new column in your spreadsheet titled 'expiry date.' Add the expiry date data into this column for each of your recipients that you are issuing to. For more information on how to upload credentials using the spreadsheet method, click here.
Adding a Custom Expired Message
You can add a custom message to expired credentials to explain the expiry and prompt them to renew.
- Go to the Main Menu by clicking on your name at the top right-hand corner of the Accredible Dashboard, click 'Settings.'
- In the left-hand sidebar menu, click on 'Recipient View Options'
- Scroll to the bottom of the page to find the 'Expiry - Message' section and enter the message you wish your recipients to see on their expired credentials.
Has this article helped you? Let us know!
If you would like to tell us about any improvements you feel could be made to this page, you can email us at support@accredible.com.